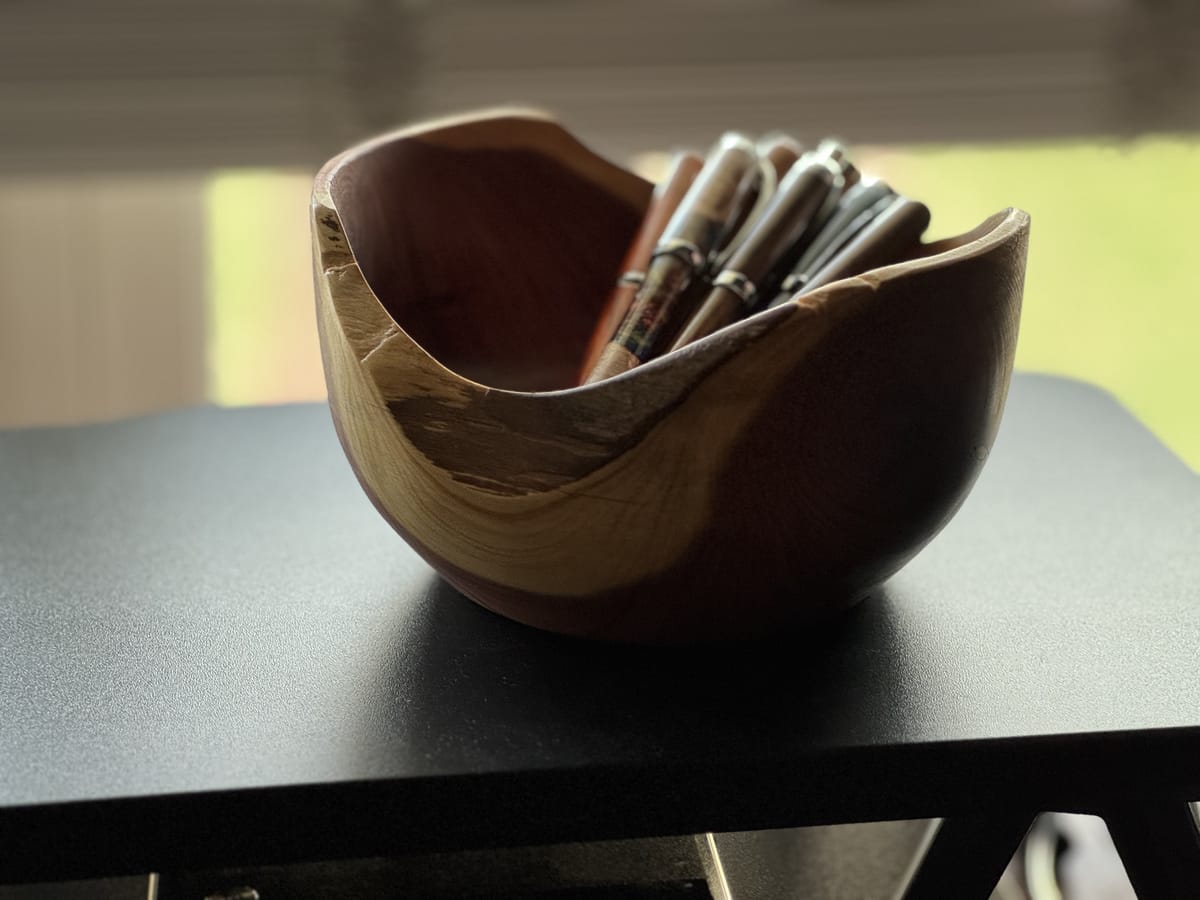
Natural Edge Cedar Bowl
My first natural edge bowl started from an Eastern Red Cedar log. This was a challenging piece to turn and finish. The Osmo PolyX finish is remarkable.
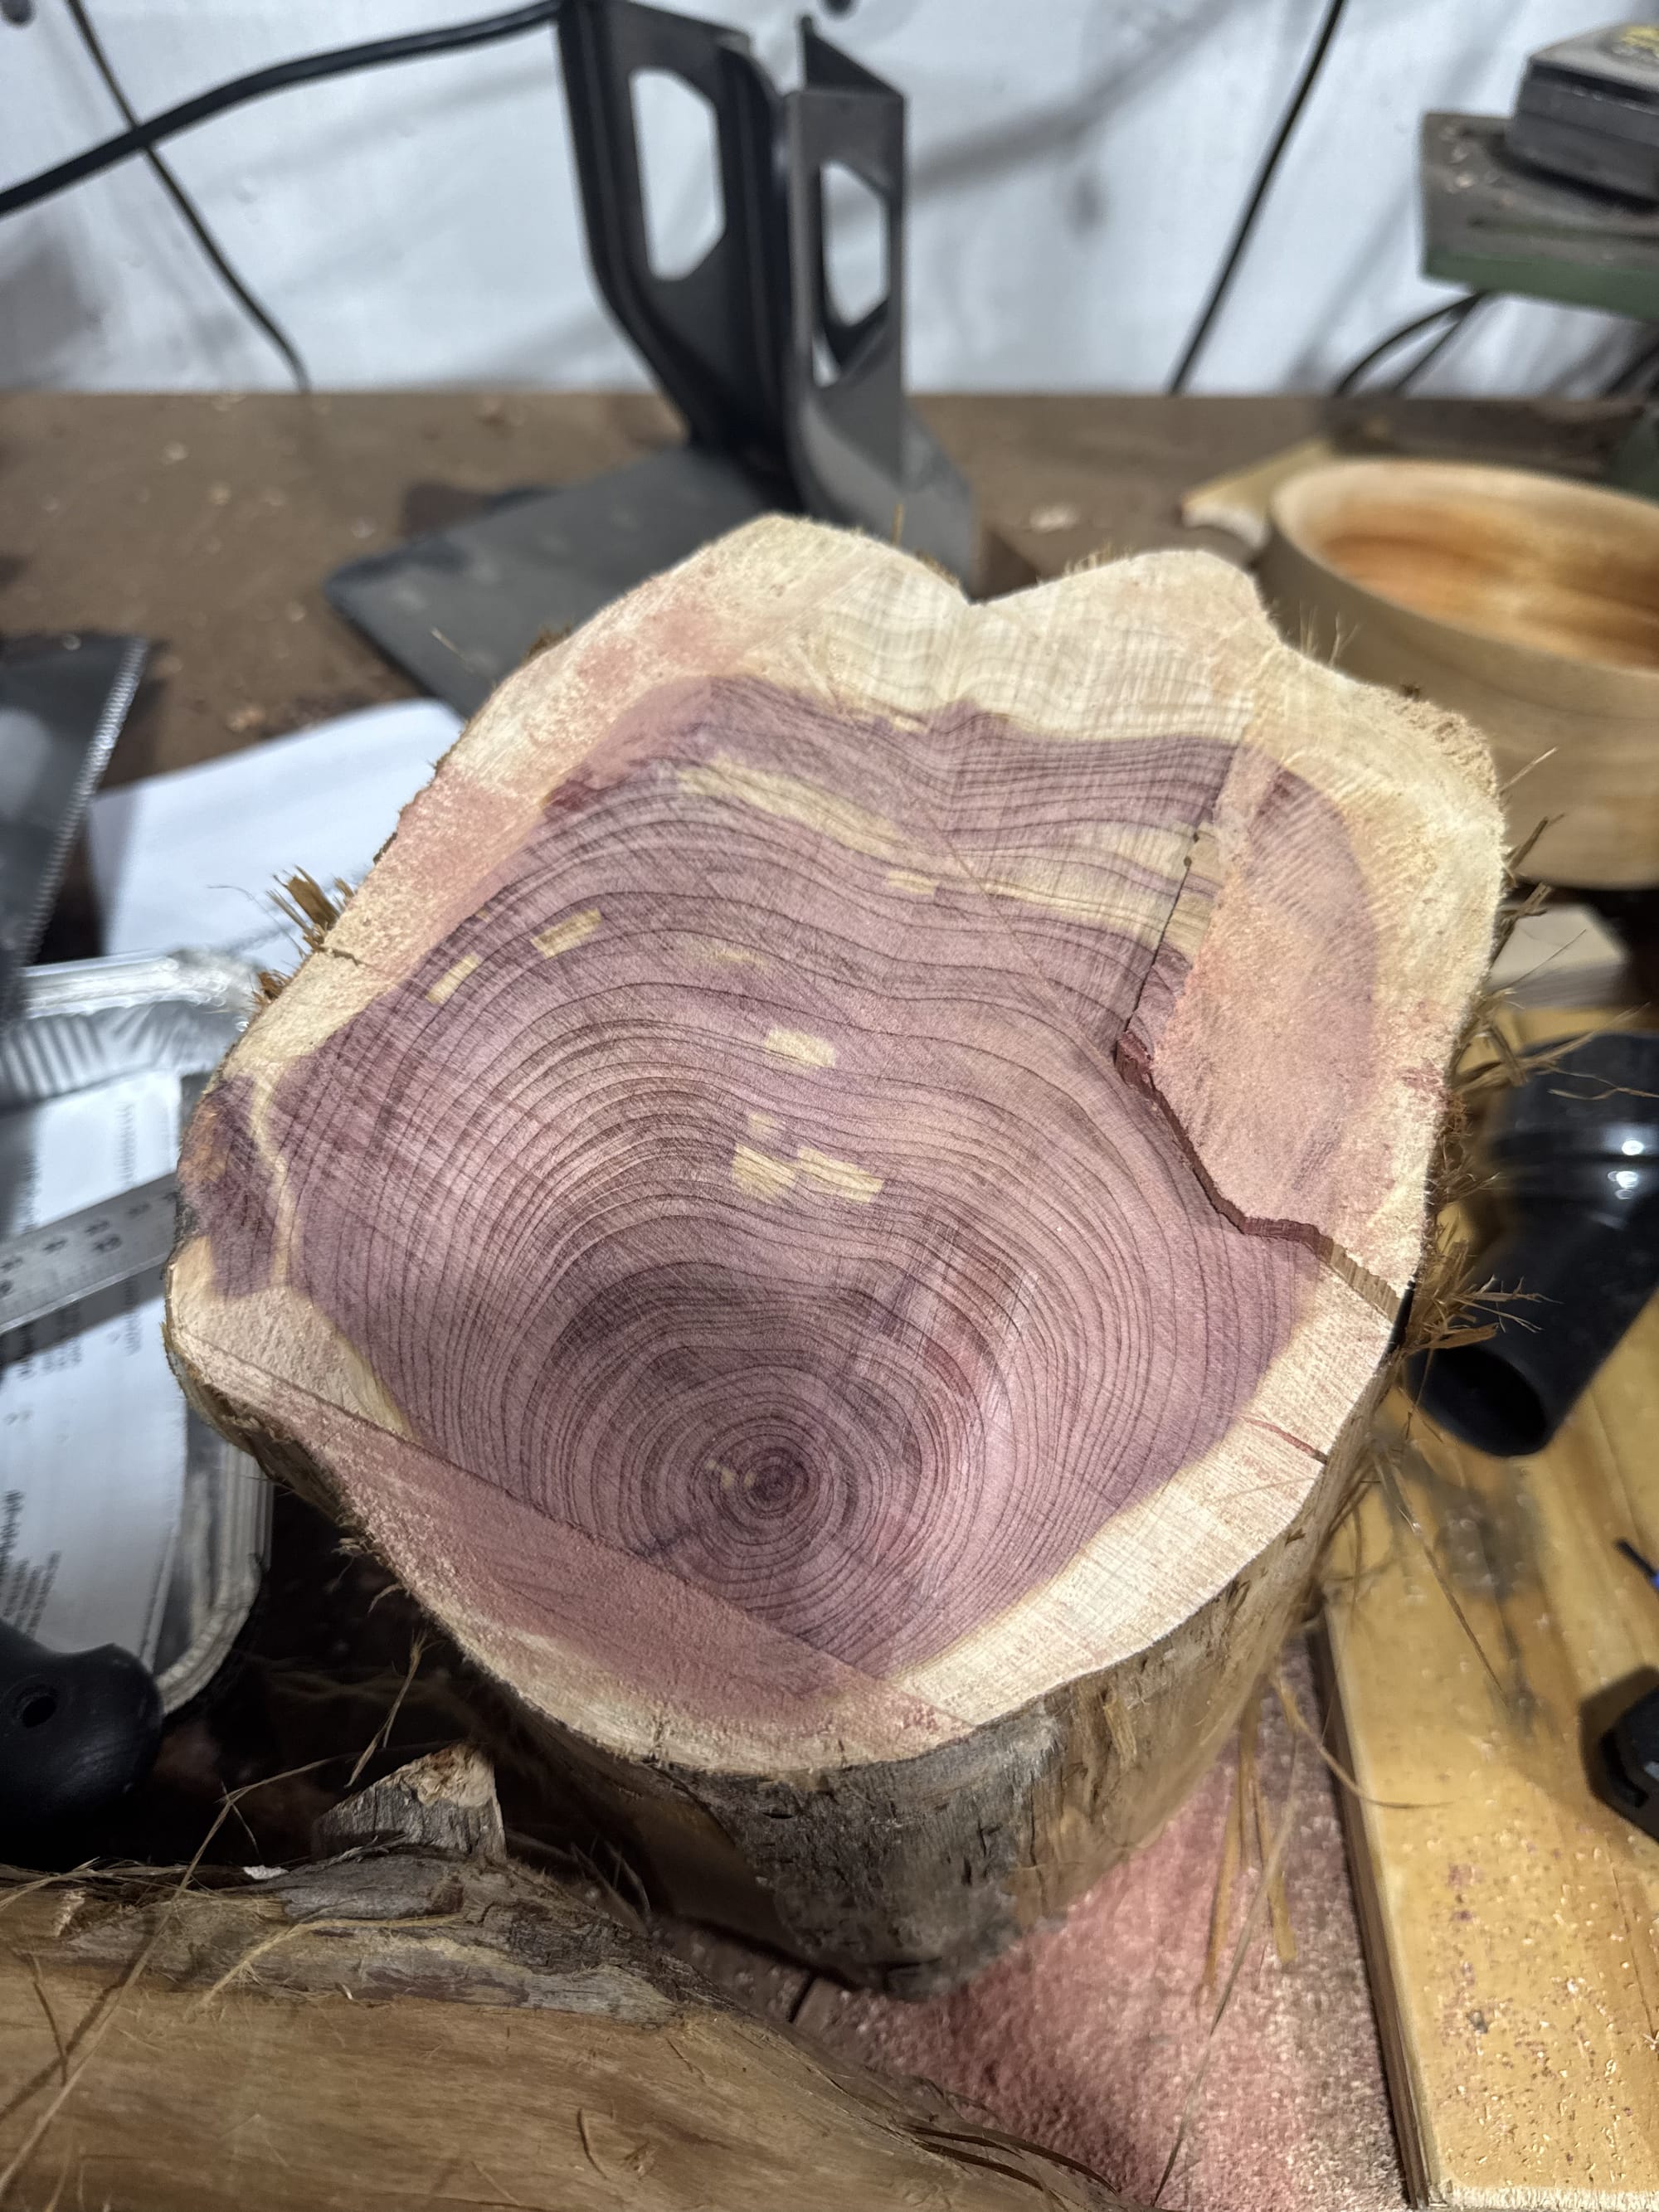
My first natural edge bowl started from this Eastern Red Cedar log that I purchased. Using a chain saw I cut it in half lengthwise to make two halves.
Prep and Initial Turning
Turning this was a bit of a challenge for me. Most of the turning I've done so far was on symmetrical or round wood blanks. Never before have I tried an irregular piece of wood like this. The pith (the center of the tree) was slightly off-center in this piece. While some turners avoid keeping the pith due to potential cracking, I decided to incorporate it into the design. I'll be keeping a close eye on it to see how it behaves over time, but I loved the character it added to the bowl.
My Rikon lathe struggled initially with the weight of the piece. I built my workbench with a lot of mass, including about 100# of concrete blocks in the lower shelf area of the bench. It weighs a ton and keeps most vibration down. But this irregular piece definitely challenged all of that.
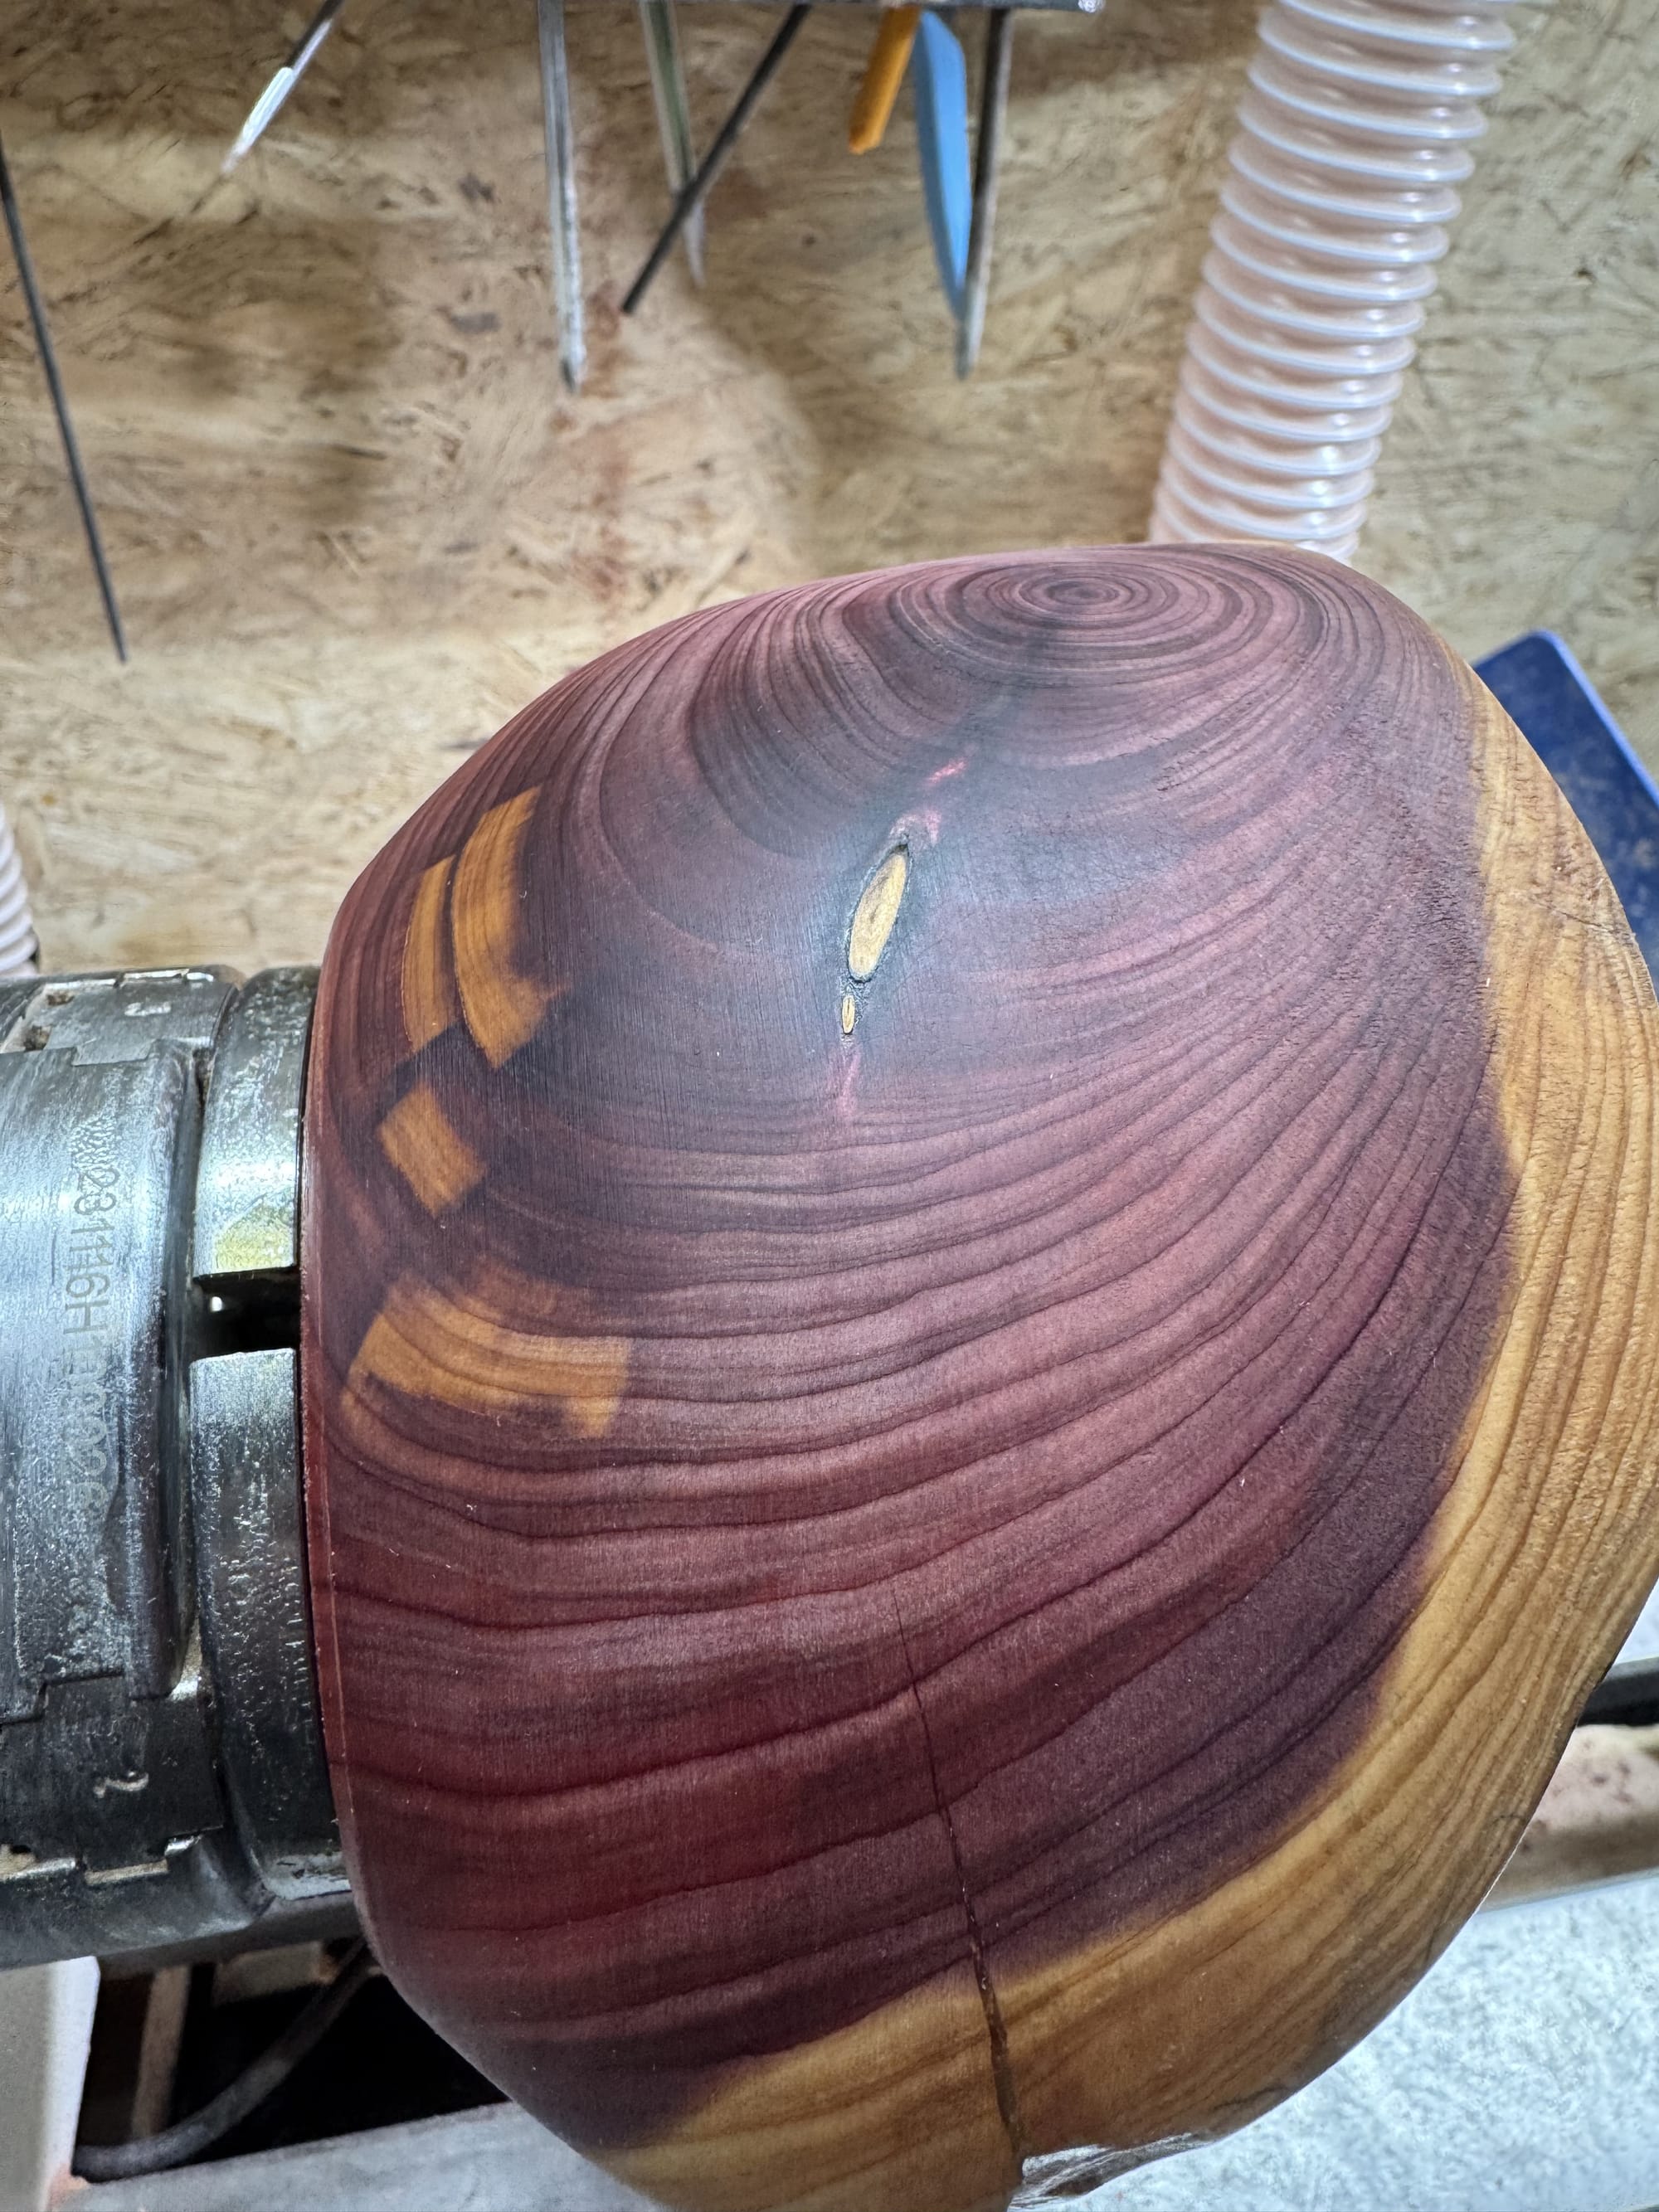
Once the irregular aspects of the piece went away, it was just like turning any other bowl. Cedar is a wonderful wood to turn, though it dulls the tools a decent amount. The garage smelled amazing as I was turning it.
Shape and Design
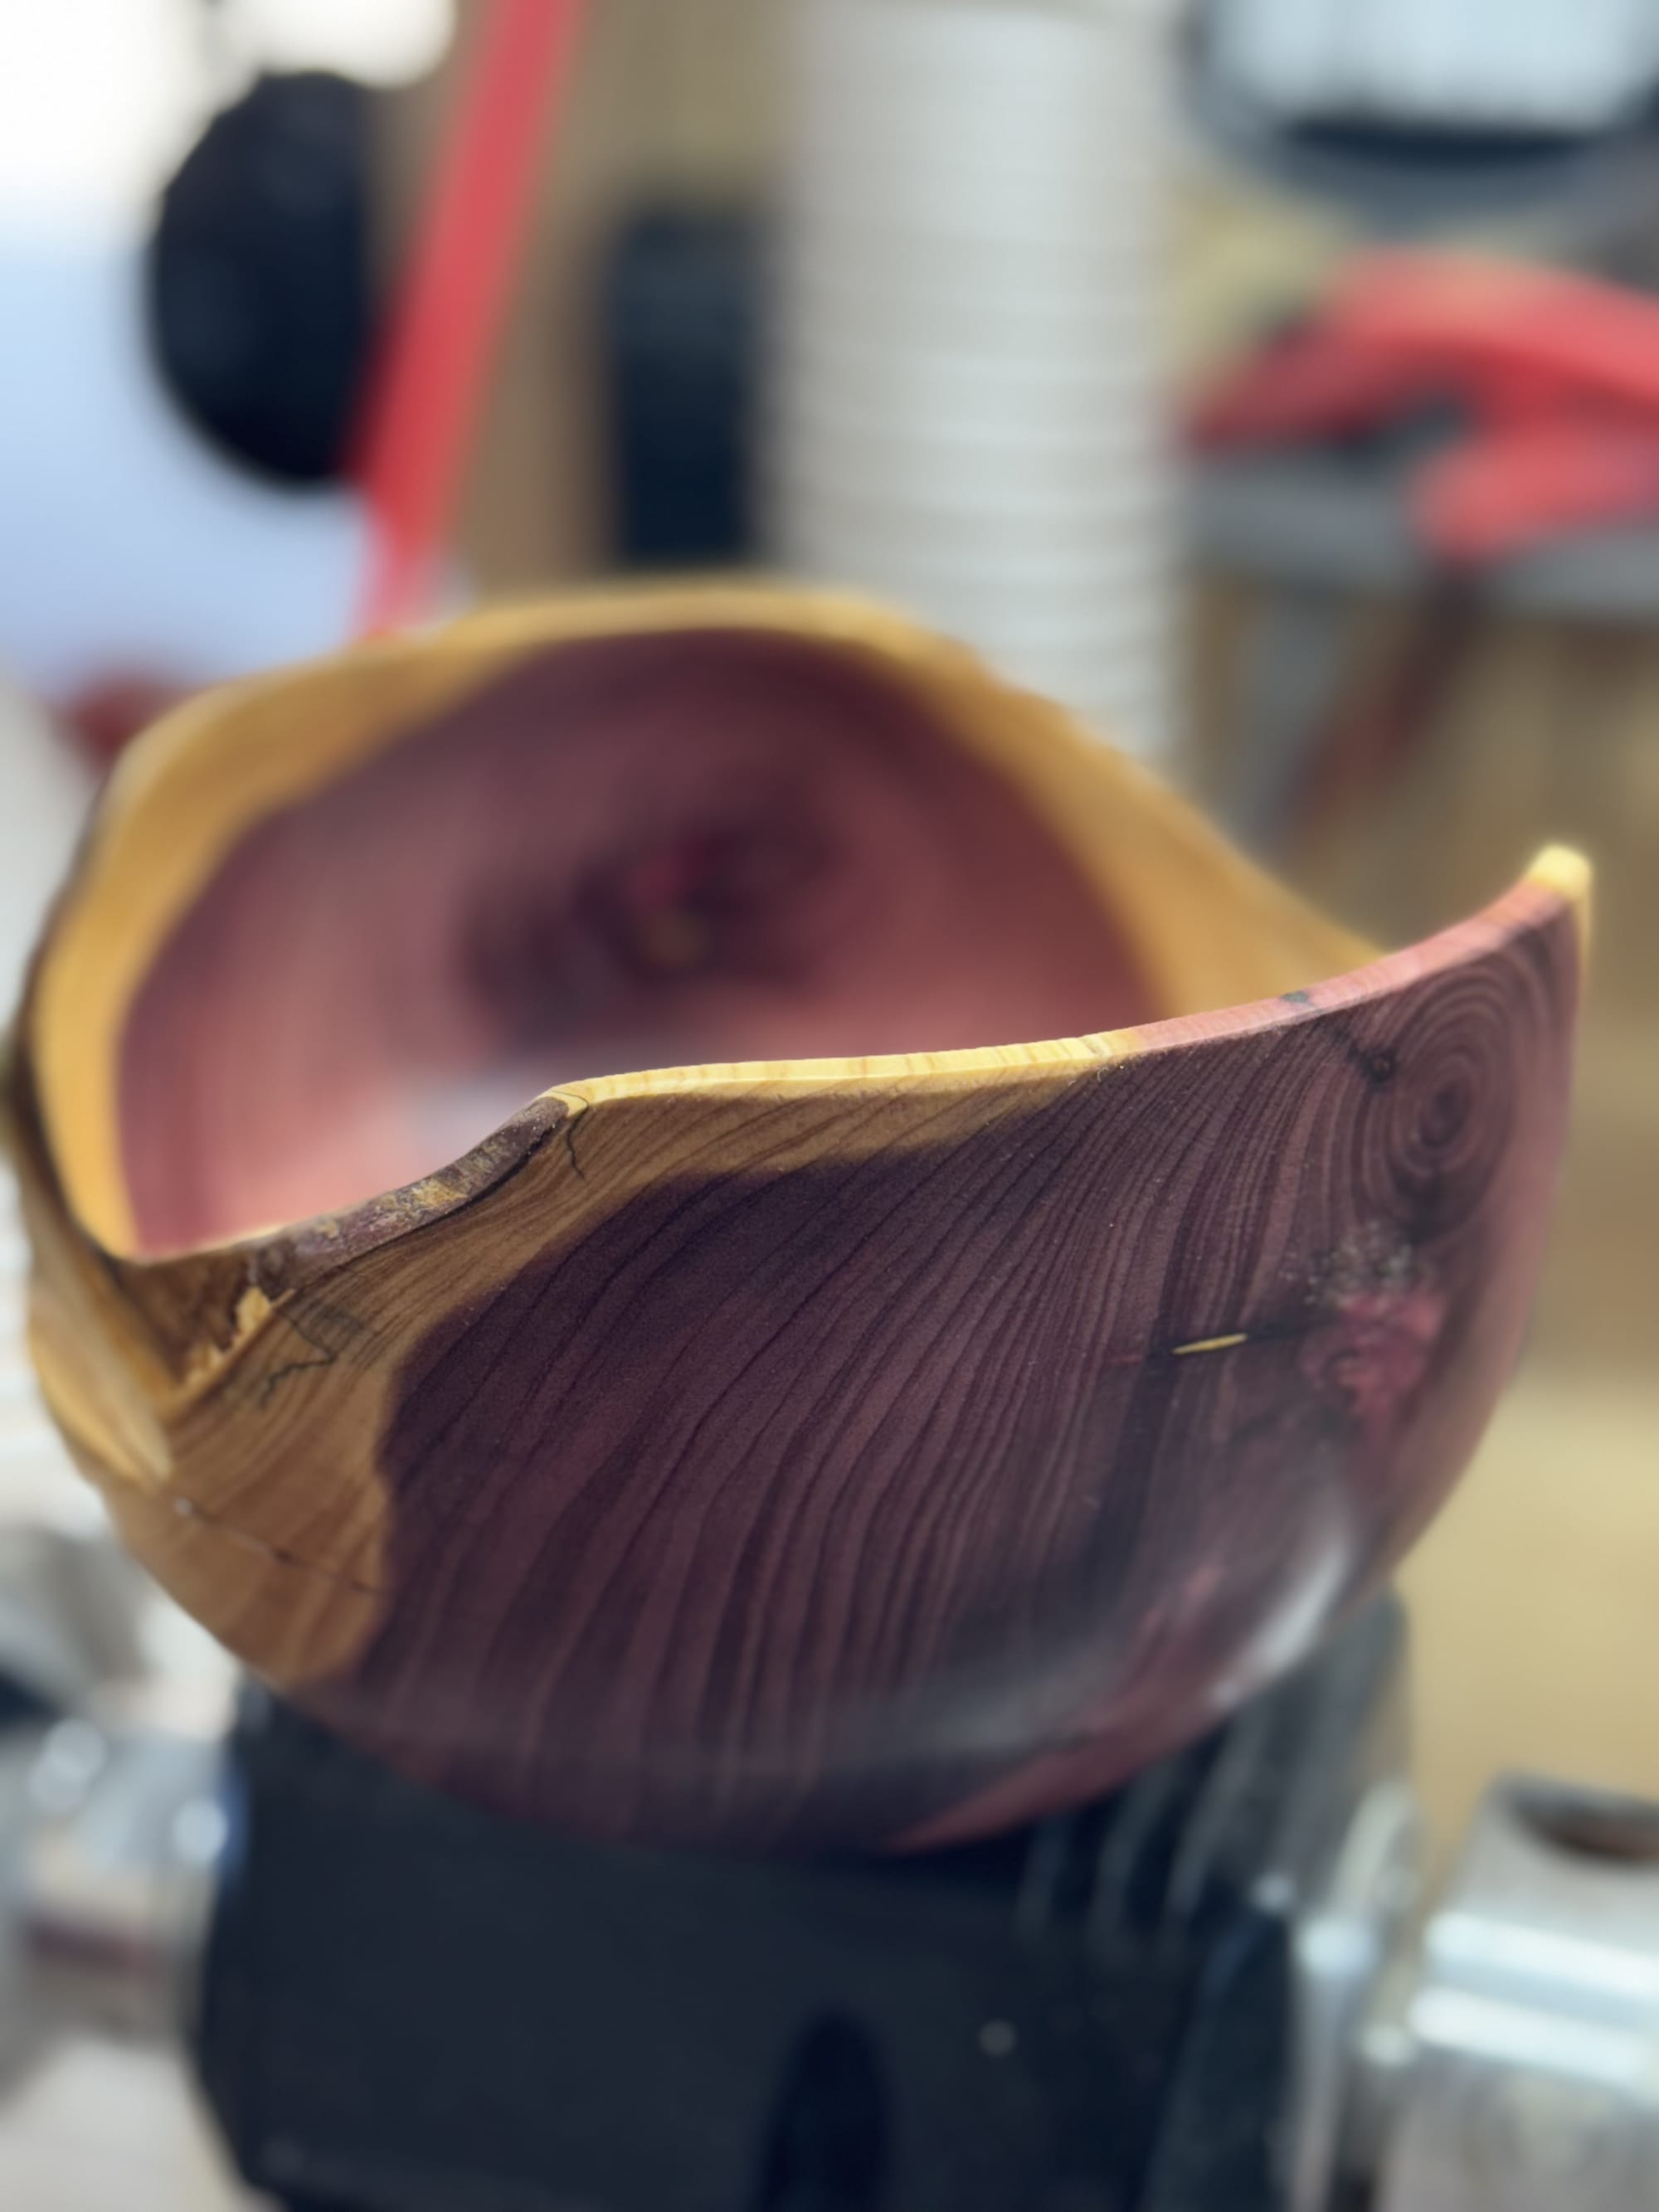
The organic shape that took place was really cool to see. I had no idea what it was going to look like in the end. One of the trickiest parts of turning a natural edge bowl is preserving the bark. I carefully worked around the edge, trying to keep as much of the bark intact as possible. Unfortunately, some of it came loose during the process, but I was able to retain a few interesting sections, adding to the bowl's rustic charm.
Sanding
The sanding process was very difficult. I had to start and re-start it several times. The advice I received was to sand with light pressure at all times, so avoid deep scratches that can't be sanded out. Each time I got to the end and thought I was done, but I kept seeing swirl marks on the darker heartwood.
Alternating between an air-powered oscillating sander and drill power sander with light pressure eventually left a swirl free surface. Also important to blow off and/or wipe down with denatured alcohol after each grit so the previous grid doesn't continue to scratch the surface.
Finishing
To finish the bowl and protect the wood, I used two thin coats of Osmo Polyx Oil (3054 Satin Finish). I chose this particular product because it's a durable, hardwearing finish made from natural vegetable oils and waxes. It's also water-resistant, which is important for a bowl that might occasionally encounter moisture.
The finish process was:
- Power sanding to 240 grit
- Yorkshire Grit (Regular and Fine)
- Mineral spirits to remove the wax. This step is crucial because the wax in Yorkshire Grit will prevent other finishes from adhering properly.
- Osmo Polyx Satin - two coats
Lessons Learned
Some lessons learned I will use in future cedar/natural edge projects:
- Sharpen tools often.
- Satin or matte type of finishes likely look best. I don't think a glossy finish would go well with the rustic look of cedar.
- Take it easy on the sanding to avoid deep scratches that will mar the final finish.
Overall I love the finished product, and it looks great on my desk. Will be trying more natural edge projects in the future. Have you ever tried turning a natural edge bowl? Share your experiences and tips in comments below!